
As you can see, the bathroom was "blah" with mis-matched cabinets that we had purchased out of a desperate need for more storage on a small budget.

We had manged to get two towel racks in behind the door...

...and the previous owners had left a hook by the shower and a hand towel ring to the left of the sink. The medicine cabinet was very simple and boring.
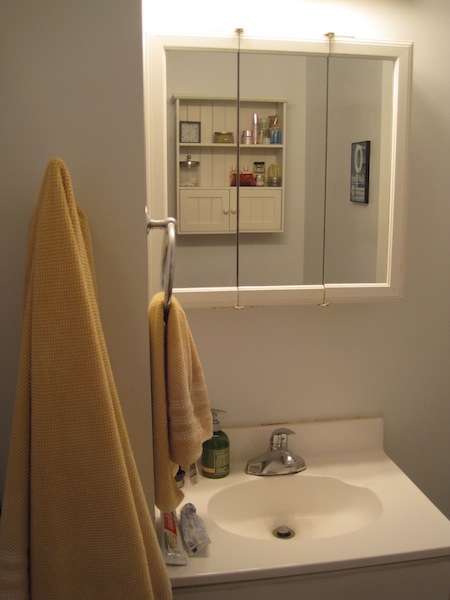
Our light fixture was as basic and cheap as they come...

...and the vanity had seen better days with layers of grime that could not be scrubbed off...

...and well-worn cabinet doors. Say it with me: that bathroom was BLAH.

To start off the day of demo, we ripped out the baseboards, removed the wall cabinets, storage cabinets, and towel racks.

The aftermath of removing the baseboards wasn't as bad as I'd expected, but it still wasn't great. To save on money we left the blue tile, although if money, time, and lack of a bathroom for a couple of days wasn't an issue, we would have replaced it.

After we removed the medicine cabinet, to our surprise we found a big patch of unpainted drywall full of holes! Seriously, it looked like the site of a shooting...remember that scene in the "Goonies" where Chunk discovers the bullet holes? I totally had that moment.

Just for giggles, I thought I'd share the top of our light fixture. This is as it was, completely untouched by us. Really? Wires just hanging out like that? Sigh. It was safe enough, but just so ugly.

Steve had great joy in removing the sink!

And we then discovered another "really?" moment when we saw the layer of cardboard filling in gaps. Sadly, we had to do the same thing when we installed the new vanity. Why, you ask? Because the wall ISN'T SQUARE!! There was no way to correctly install a vanity with a crooked wall. Double sigh.

Steve worked on filling many holes throughout the renovation. Repeat after me: Spackle is your friend!

When the room was emptied, I taped all of the edges...

...and put on two coats of bright white paint. It's amazing how much it livened up the space from the almost gray color they had on the wall (I love gray, but the color that was up was just dull at best).

We took a break for beer. Our first day we worked from 2pm-3am, so beer breaks were a must.

On our second day of the renovation, we made sure to give ourselves an extra treat with pizza from our favorite place in the city, Piece. Doesn't get any better than this.

Ok, back to work. We were SO excited to rip down this light fixture! We left it as long as possible because we needed the light, but didn't want to get paint on the new fixture.

After about 2 1/2 days of work, we were incredibly happy with the end results. It was the biggest home improvement project we had ever done, and was the first time we'd had to do any sort of plumbing. As it turns out, I'm a whiz with the plumbers tape, so I can add that to my resume one day.
Where we used to have a wall cabinet above the toilet, we put up two long white shelves (from IKEA) and are keeping only decorative items on them so they're nice and clutter free.

We also purchased this Lillangen floor cabinet for more storage.

And I love our simple toilet paper holder, also from IKEA!

While I had thought we'd get the Lillangen series from IKEA for the vanity, when we saw it in person it just didn't look as great in person. Instead, we went with the Godmorgon series. It was a little more expensive, but we loved the look and extra storage.

You really can't beat the two pull out drawers! It's the best storage in the world. And while it took some more creative plumbing to get everything to fit into place, it was well worth it. All of my makeup, hair dryer, flat iron, etc are all right at my fingertips.

Instead of that old hand towel ring, we got these awesome little hooks that are part of the Grundtal series. Out faucet was also part of this series.

We love our new light fixture that is minimal and simple, and our big mirror is fantastic!

Behind our door, where we used to have towel racks we got this tall wall cabinet for extra storage.

See how much it holds?! Love it, and love keeping our toothbrush and all of the personal stuff hidden away.

Oh yes! And you may have noticed that there aren't any towel racks for bath towels. Nothing really fit our needs, style, or space. Then we happened upon this hanger at IKEA and fell in love! It fits our needs completely, is from the same series as the rest of our fixtures, and works perfectly.

See how great it is with towels on it?!

So, after months of plotting and planning, coupled with hours of work, our bathroom is finished, functional, bright and clean. We've maximized storage, made better use of the space overall, and turned our one and only bathroom into a bathroom that almost feels like a second bathroom. Since Steve meets with clients at our house, we wanted to be very conscious of creating a space that clients could use without feeling like they were walking into our personal space.
All-in-all, I'd say we did this renovation for right around $1,000, including everything we purchased from IKEA (vanity, fixtures, shelves, storage cabinets, etc), everything from Home Depot (paint, mirror, light fixture, new toilet seat, new baseboards, etc) and random extras (new shower curtain, new towels). Money well spent!


2 comments:
Wow, that is a fabulous transformation, way to go!
I am just now reading this! Laura, it is AWESOME!! Great job! :) You should do a post that breaks down costs - I feel like people like that sort of thing.
Post a Comment