I'm so excited to share that Sadie is a one year old! I can't believe how quickly this year has flown by, and I never stop thinking about how immensely lucky we are to have a happy, healthy, silly little daughter. Even if she overtired or sick with a cold, our little miss Sadie is so happy - I wish I could have her sunny outlook on life!
Ok, onward to Sadie's first birthday party! We chose a rainbow theme because Sadie is such a bright, sunny little girl so it only made sense to feature bright colors. And since
I always love to know all
kinds of details (where, what, how), I'm going to be incredibly thorough.
Party Timeline
The party was scheduled from 11am-1pm. If
I could go back and change it, I would shift it to a little bit later to fit
better with nap schedules - Sadie barely napped that morning, and the other
kids at the party didn't either! Here's a rough timeline of how things worked
out that day:
11am: Everything for the party was set and guests started
arriving
11am-11:15am: I got Miss H up from her short nap, gave her a bottle,
changed her outfit, and brought her up to a room full of people (she loved
it!)
11:15am-11:45am: guests mingled, kids played
11:45am: We dressed Miss
H in her Korean hanbok (traditional dress) and did the doljabi ceremony
12pm:
We gave Miss H her smash cake and then cut the big cake for the
guests
12:20pm: We helped Miss H open up her birthday gifts
1:15pm: The
last guest left and it was time to clean up!
Food
Since the party was over the lunch hour, I wanted to make sure we had somewhat
substantial food. But I also wanted to make sure everything we made wasn't
temperature specific (i.e. didn't need to be served hot) and that everything was
easy for us to prepare ourselves. To top it all off, we had one guest who is
gluten free and one who is vegan
and gluten free. We served:
There was more than enough food for our (roughly) 15 guests and everything
was budget friendly!
Details
The details of the day are what I'm most proud
of! I spent a lot of time gathering items, making various pieces of decor, and
just trying to create a rainbow theme that was fun and bright. And I'm proud to say that I did all of my planning, crafting and baking when Sadie was sleeping - I never prioritized anything over her.
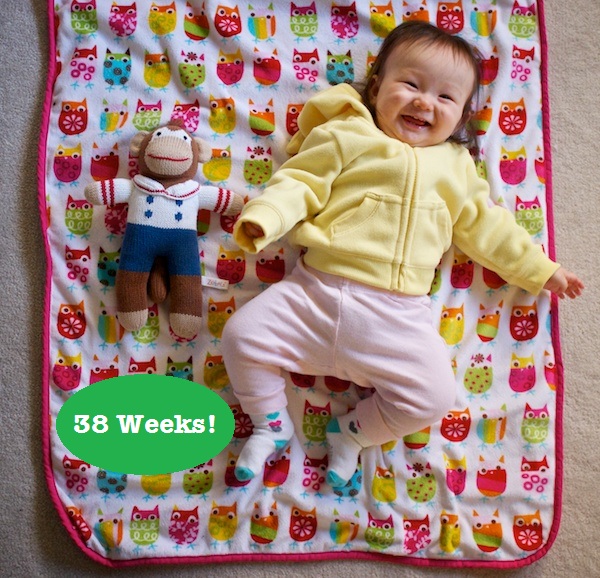
I've been blogging Sadie's week-by-week photos we've taken, so of course I
wanted to share these photos at the party! These are 5x5 prints that we hung on
twine and attached with mini clothespins. We hung these low enough on the wall
(the top row is about 6 feet high) so that our guests would easily be able to
look at all of them. It was fun hearing people comment on what their favorite
photos were and how much Sadie has changed!

I made cake pops the Monday before the party. These are great treats that can
keep for a week, so they're easy to make in advance! I'd found this little
planter with a chalkboard on the front from an Etsy seller (their shop is
currently unavailable) and I thought it would be so much fun to have "cake pop
flowers" in it!

The "Happy Birthday" banner on the wall was by the talented
Chelsey Emery, who also did the
party invitations. It was a perfect addition to the room and I love that we can
easily save it and use it year after year! We hung it with the same twine we
used for the weekly photos.

As mentioned above, we prepared all of our food ourselves for the day. I
decorated the table with scalloped paper circles punched out of cardstock in all
colors of the rainbow!

I ordered spoons and forks from
Sucre Shop,
napkins with rainbow dots from Target, and plates in rainbow stripes and solids
from Oriental Trading.

As mentioned above, we served Izze drinks (in all of the flavors they have
for great color variety!), and bottles of water (which I may or may not have
wrapped in washi tape purchased from
In The
Clear), and applesauce pouches for the kiddos.

Favors were copies of the book
Planting a Rainbow and
little individual pots and seeds (found in Target's dollar aisle!) for growing
their own flower. Since we only had 3 children as guests at the party, I could
afford to gift books.

I fell in love with the look of paper rosettes! I used
this
tutorial for them (there are many tutorials for rosettes if you look; it's a
pretty simple concept), found cardstock in solids and patterns, and afixed them
to the wall with removable mounting tape. I was worried about them not staying
on the wall, but I hung them 2 days before the party and only one had fallen off
the wall a day after the party, so we did really well! It was an inexpensive
piece of decor that added a lot of fun to the room.

I found these fabulous rainbow colored bottles/vases on Etsy (also from the
shop where I got the cake pop box, shop currently unavailable). They were
incredibly affordable and so much fun! I plan on keeping them up year round in
our dining room. The day before the party I bought white spider chrysanthemums
for each vase.
 Korean Doljabi Ceremony
After all of our guests had
arrived, Steve's mother and grandmother helped me dress Sadie in her
traditional hanbok that they had gifted her. It was a bit large on her but we
were able to tuck the sleeves under. She did amazingly well in the dress!

For the doljabi, you set items out in front of the baby and the item they
choose indicates something about his or her future. The items we opted to use
were: a pencil (scholarly), a tennis ball (athletic), a paintbrush (artistic),
money (good fortune), and string (long life). She hadn't seen any of these items
before so we knew she wouldn't be playing favorites!
I predicted she would choose the paintbrush and Steve thought the tennis
ball. I was right! After some pondering, she touched the paintbrush, then took
her hand back. And then she went for the paintbrush again. It looks like we have
a budding artist on our hands!
 Cake!
Cake!
The cakes were a labor of love, as I made both of
them. I like the idea of making her birthday cake every year as something
special that I do. I made banners for the cakes using washi tape, baker's twine,
and paper straws. The big cake said "Sadie!" and the small cake said "One."
(They're hard to read because I used metallic pens and it was really sunny). I'm
going to do a follow up post and share the recipes I used and the decorating
tutorials that I referenced.


We put Sadie in her high chair (in her "Rainbows Make Me Smile" t-shirt,
naturally) and the smash cake right in front of her. She eventually decided she
would touch the cake...

...and even sample some of the buttercream...before she picked the whole
thing up and tossed it on the floor! I had been borderline worried about her
shoveling a lot of cake her mouth and then choking on it (morbid, I know), so
part of me was relieved that she wasn't that into it. She was definitely fun to
watch!

After Sadie had her cake, it was time to cut the guest cake! I always enjoy
the "big reveal" when a cake is fun on the inside.

I was incredibly pleased with how vibrant my rainbow colored layers turned
out, and how neatly they were stacked!

I had been planning this cake in my head since January, so it was incredibly
rewarding seeing it come to life, and it was even more rewarding sampling the
delicious cake!

We almost forgot a family picture! So here we are at the very end of the
day!

And that, in a nutshell, was Sadie's rainbow first birthday party! It was
such a wonderful day and it was worth all of the prep and hard work! Keep your
eyes out for a more detailed post on the cakes, including the recipes and tutorials I used for inspirationg, baking, and decorating.
Happy birthday to our little "Say Say!"